Calibrating the Camera
Camera calibration is a special challenge with commodity cameras. Temperature changes, vibrations, focus, and other factors can affect the derived parameters with substantial effects on resulting data. Automatic or self calibration is possible and desirable with drone flights, but depending on the flight pattern, automatic calibration may not remove all distortion from the resulting products. James and Robson (2014) in their paper Mitigating systematic error in topographic models derived from UAV and ground‐based image networks address how to minimize the distortion from self-calibration.
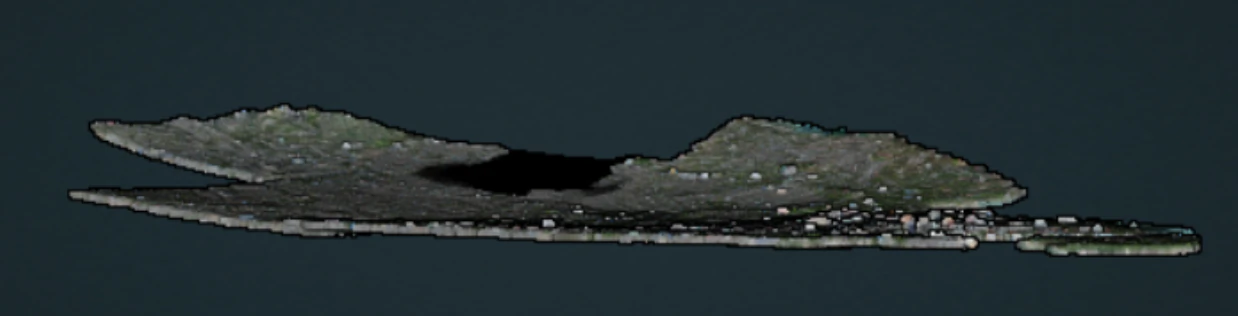
Bowling effect on point cloud over 13,000+ image dataset collected by World Bank Tanzania over the flood prone Msimbasi Basin, Dar es Salaam, Tanzania.
To mitigate this effect, there are a few options but the simplest are as follows: fly two patterns separated by 20°, and rather than having a nadir (straight down pointing) camera, use one that tilts forward by 5°.

As this approach takes longer than traditional imaging, pilots and teams may apply this technique to a smaller area and use the collected data to optimize future flights. WebODM can generate a calibration file called cameras.json from a small sample flight. The calibration file can be used for future flights, mitigating the bowling effect without sacrificing efficiency.
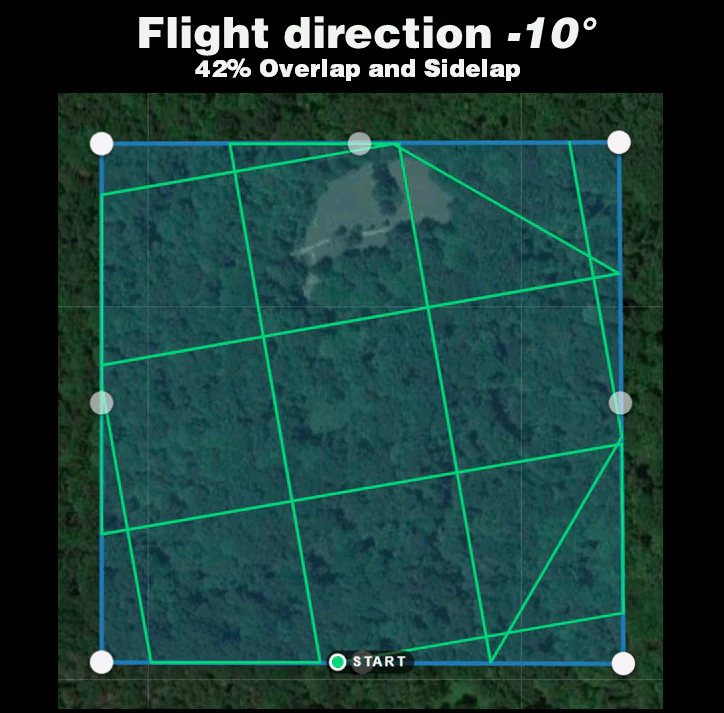
Alternatively, the following experimental method can be applied: fly with much lower overlap, but two crossgrid flights (sometimes called crosshatch) separated by 20° with a 5° forward facing camera.
- Crossgrid overlap percentages can be lower than parallel flights. To get good 3D results, you will require 68% overlap and sidelap for an equivalent 83% overlap and sidelap.
- To get good 2D and 2.5D (digital elevation model) results, you will require 42% overlap and sidelap for an equivalent 70% overlap and sidelap.
Vertically separated flight lines also improve accuracy, but less so than a camera that is forward facing by 5°.
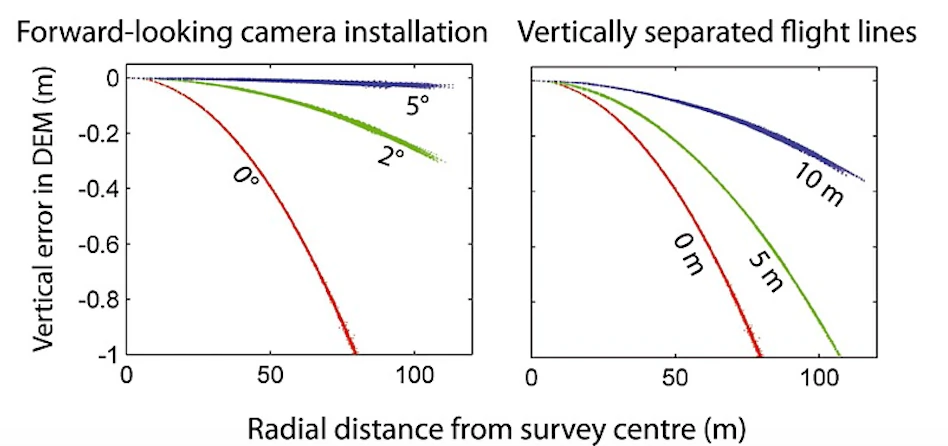
From James and Robson (2014), CC BY 4.0